Setting up Philips HeartStart FRx Defibrillator AED

Setting up Philips HeartStart FRx AED is very simple and quick. Below is a quick start guide which also provides illustrated instructions for setting up the FRx, described in detail below.
Please note, for full details or assistance with setup please contact Philips directly.
- Remove the FRx from its packaging. Check that the battery and SMART Pads are installed
- Pull out and discard the green Setup tab. (To prevent the pads’ adhesive gel from drying out, do not open the pads case until you need to use the pads)

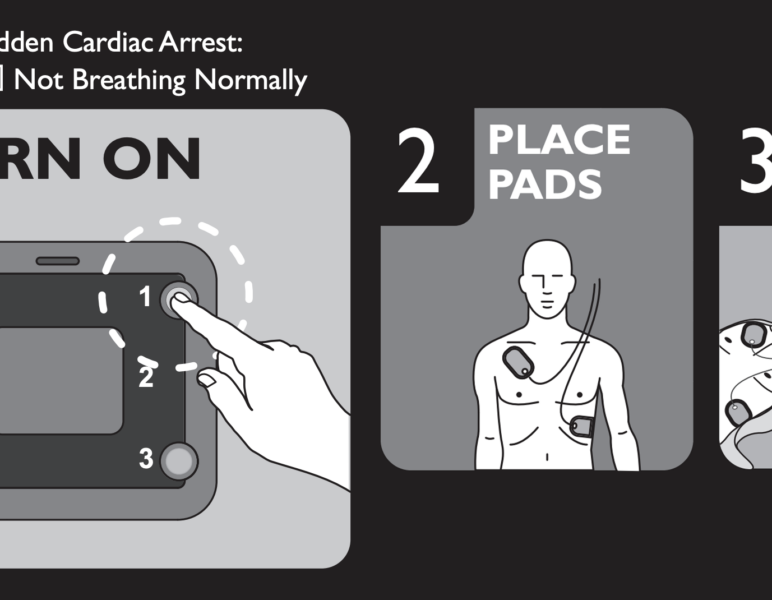
- The FRx will automatically run a self-test. Press the Shock button and the On/Off button when instructed. Be sure to let the selftest run all the way to completion. When the self-test is over, the FRx will report the result, and tell you to push the green On/Off button in case of an emergency. (Do not push the green button unless this is an actual emergency.) Then the FRx will turn off and go to standby mode.* The green Ready light will be blinking to show the FRx is ready for use.
- Install the FRx in its carry case, if it is not pre-installed. Check that the Quick Reference Guide† is face up in the clear plastic window on the inside of the carry case. Philips recommends that you store a spare pads case and spare battery with your FRx. If you are using an FRx carry case, there is an area in the lid of the case, under the flap, to store a spare package of pads and a spare battery
(NOTE: Do not store anything in the defibrillator carry case that it is not designed to accommodate. Store all objects in their intended location in the case.)